Transaction Report Configuration
Ottu provides automated transaction reporting so you can monitor payment activity without manual effort. Reports can be delivered by email or SFTP on a schedule you define. There are two report types:
Want a report right now? Export the transactions table from the dashboard: no schedule needed.
- Periodic Transaction Reports — recurring reports generated at a fixed interval (daily, weekly, monthly)
- Flexible Interval Transaction Reports — custom reports with more granular control, including SFTP delivery and breakdown columns
Periodic Transaction Report Configuration
Periodic reports generate automatically on a recurring schedule and can be emailed directly to your team.
Accessing Periodic Reports
- Open the Ottu Dashboard
- Click the three dots in the top-right corner to open the Administration Panel
- Navigate to Report > Periodic Report Config

Click Add Periodic Report Config, then fill in the fields below.
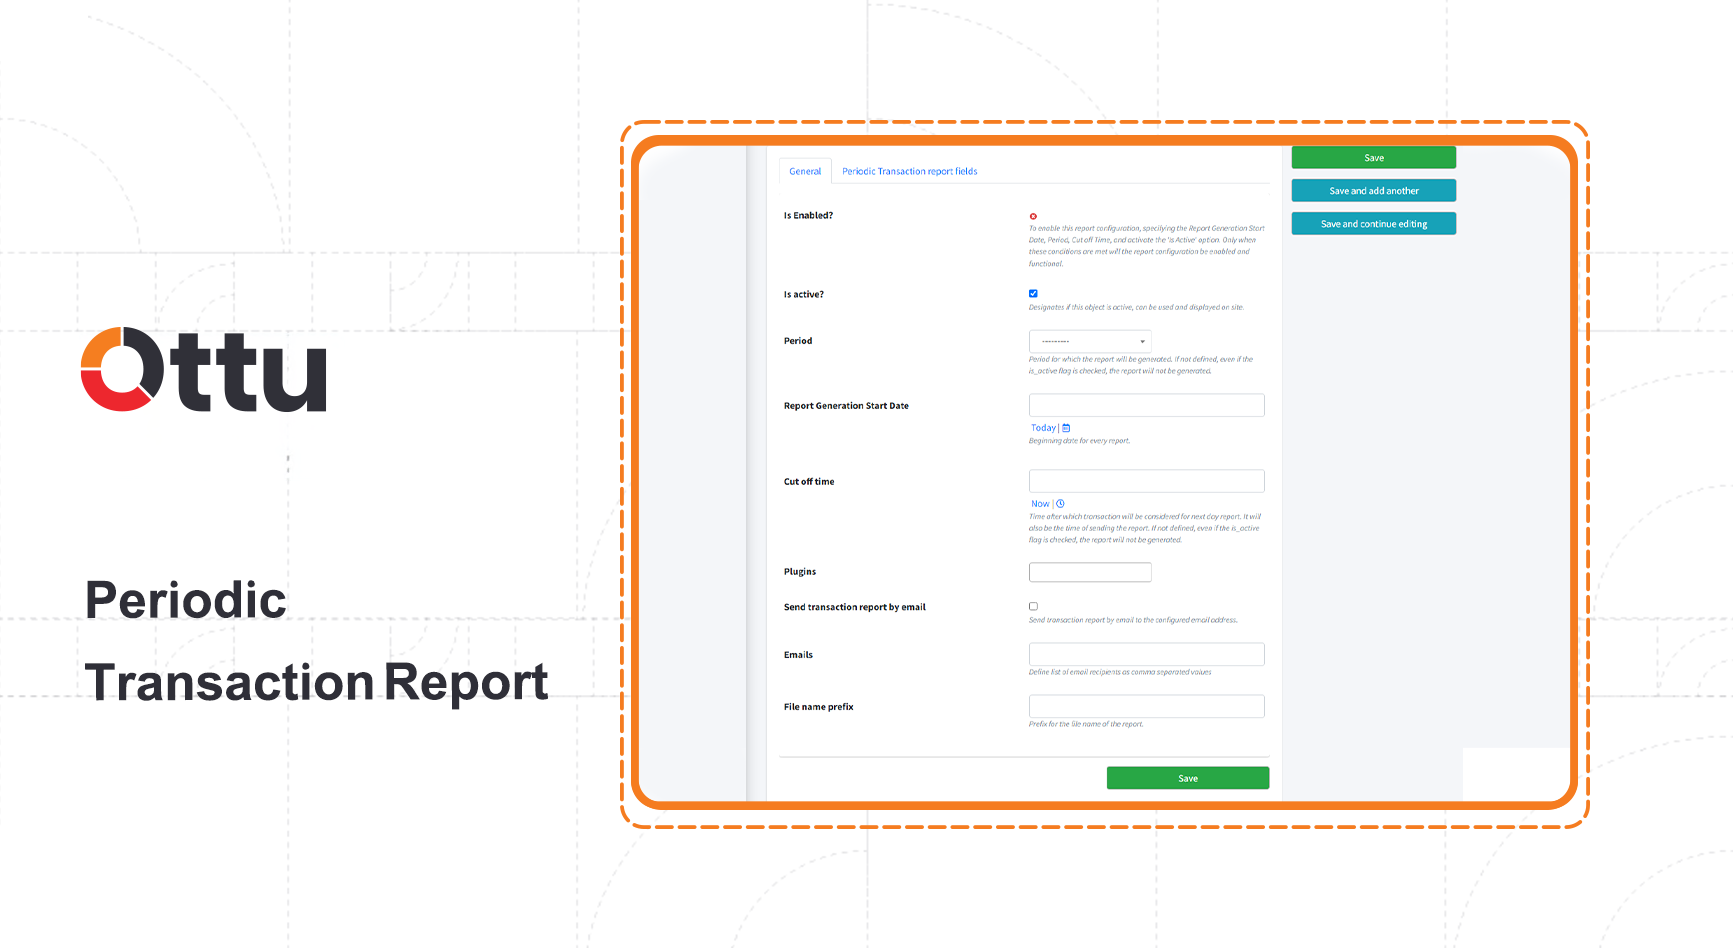
Field Descriptions
| Field | Description |
|---|---|
| Is Enabled? | The report only becomes active once all required fields are completed: Report Generation Start Date, Period, Cut-off Time, and the Is Active flag |
| Is active? | Whether this report configuration is currently active and visible on the dashboard |
| Period | How often the report is generated (e.g., daily, weekly, monthly) |
| Report Generation Start Date | The date report generation starts from |
| Cut-off time | The time at which transactions are evaluated for inclusion in the next report. Also determines when the report is sent. If not set, the report will not generate even if Is Active is enabled |
| Report timezone | The timezone of the dates and times in the report. Default: Asia/Kuwait |
| Plugins | Which plugin the report covers |
| Send transaction report by email | When checked, the report is automatically emailed to the specified addresses |
| Emails | The recipient email addresses for report delivery |
| File name prefix | A prefix added to the report filename for easy identification |
Flexible Interval Transaction Reports
Flexible reports offer additional delivery options (SFTP) and data granularity (breakdown columns) beyond what periodic reports provide.
Accessing Flexible Reports
- Open the Ottu Dashboard
- Click the three dots in the top-right corner to open the Administration Panel
- Navigate to Report > Flexible Report Config

Click Add Flexible Report Config, then fill in the fields below.
Field Descriptions
| Field | Description |
|---|---|
| Is Enabled? | The report only becomes active once the Cut-off Time is defined and Is Active is enabled |
| Is active? | Whether this report configuration is currently active and visible on the dashboard |
| File format | The file type of the report: CSV (default) or XLSX |
| Cut-off time | The time at which transactions are evaluated for inclusion in the next report. Also determines when the report is sent. If not set, the report will not generate even if Is Active is enabled |
| Report timezone | The timezone of the dates and times in the report. Default: Asia/Kuwait |
| Send transaction report by email | When checked, the report is automatically emailed |
| Emails | The recipient email addresses for email delivery |
| Send transaction report by SFTP | When checked, the report is securely transferred via SFTP |
| SFTP server host address | The hostname or IP address of the SFTP server |
| SFTP upload path | The directory on the SFTP server where reports are uploaded |
| SFTP server username | The username for SFTP authentication |
| SFTP server password | The password for SFTP authentication |
| SFTP server host key | The SSH host key the SFTP server must present. Leave it blank and Ottu records the key on the next delivery; after that, a server with a different key is rejected |
| File name prefix | A prefix added to the report filename |
| Add breakdown columns | When checked, columns like refunded_amount and voided_amount appear as separate columns in the report, giving you more granular financial data |
Report Fields
Each report configuration has a Fields section that sets the columns of the report file. It has two lists:
- Available Headers: every column you can add. This covers the transaction's own fields, values from the payment gateway's response, calculated values such as the customer's full name, the plugin's custom fields, and extra columns such as Application (the application that created the payment). Hover over a header's info icon to see what it holds.
- Selected Headers: the columns that go into the file, in this order.
Adding Report Fields
- Open the report configuration and scroll to Fields.
- Drag a header from Available Headers to Selected Headers. The search box above each list finds a header by name.
- In the form that opens, change the English or Arabic label if you want. The label is the column title in the file. An English label can use only letters, digits and spaces.
- Drag the selected headers into the order you want. Double-click a selected header to edit its label again.
To add a column with the same value on every row, such as a merchant code, click Add Static Header and fill in Field Name, English Header Name, Arabic Header Name (optional), Static Value and Formatter (String, Decimal, Date or Date Time). The button works once at least one transaction or gateway header is selected.
Dashboard Export
The Export Transactions option on a plugin's transactions table uses that plugin's dashboard report configuration: go to Administration Panel > Report > Dashboard report configs and open the plugin's entry. Its Fields section works the same way, and only its selected headers can be exported from the dashboard. Headers added in a new Ottu version, such as Application, are not selected until you add them.
What's Next?
- Payment Management — Track and search transactions from the dashboard
- Webhooks Configuration — Set up real-time event notifications
- Plugins — Configure the plugins that reports can be scoped to